How do I install Dynmap on my Minecraft server?
18 February 2026
Dynmap is a plugin that turns your Minecraft world into a live map. You can think of it as Google Maps for your server.
Downloading the plugin
First, we need to download the plugin. It is important to make sure you download the correct version that matches your server. You can download Dynmap from this website.
Once the file has been downloaded, we can continue and upload the plugin to the server.
Installing Dynmap on the server
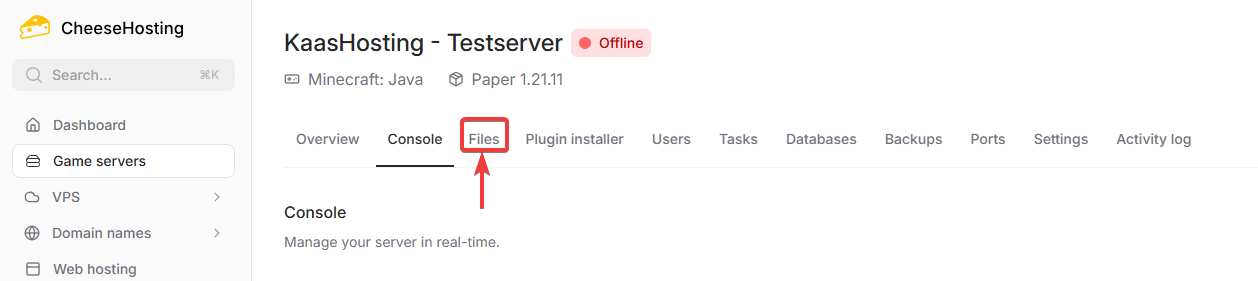
Go to the control panel and click on the server where you want to install Dynmap.
Make sure the server is turned off.
Click Files in the top navigation bar.
Open the plugins folder.
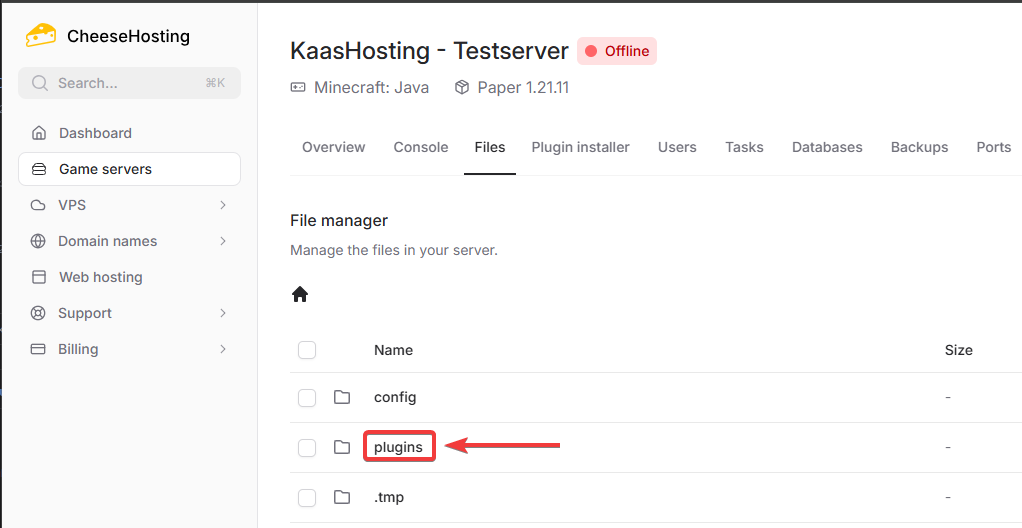
Click the Upload button in the top right corner.

Select and upload the Dynmap plugin file you just downloaded.
Wait until the upload is complete.
Great job. The Dynmap plugin is now on the server. To make sure Dynmap generates all required configuration files, you need to start the server once.
When the server has fully started, you can continue with the next step, opening a port.
Opening a port
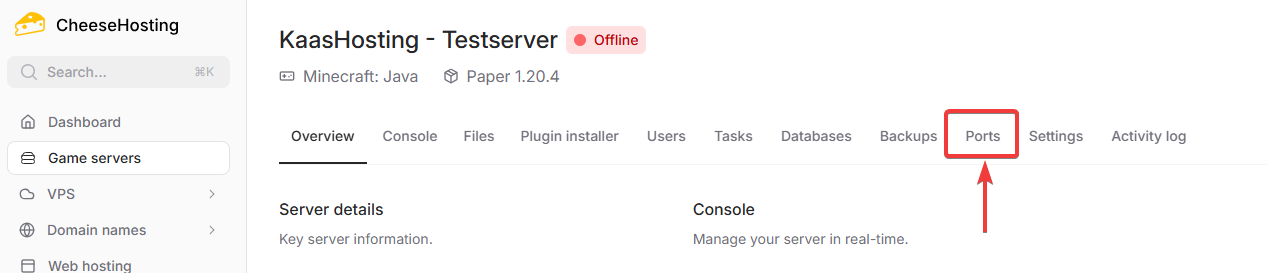
Click Ports in the top navigation bar.
Click Add Port in the top right corner.
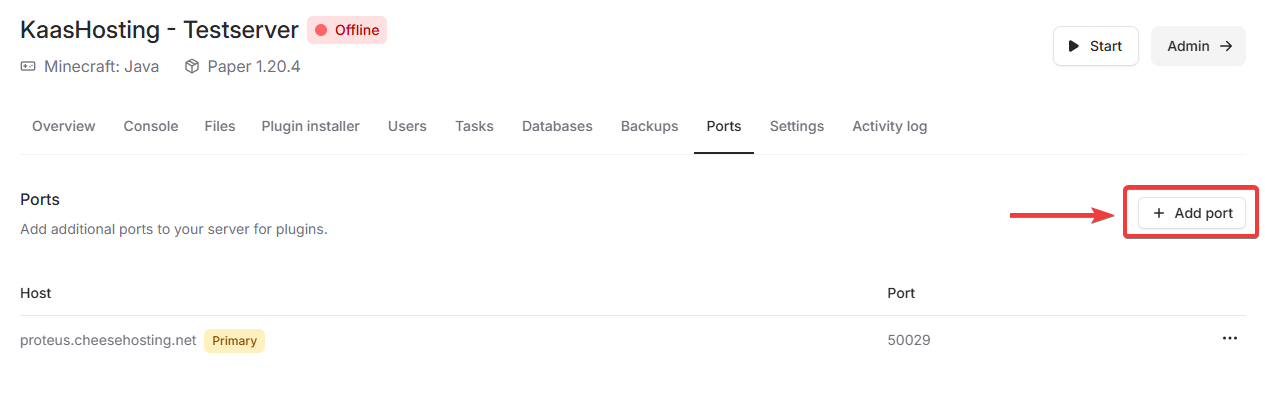
Choose any available port from the list, select it, and click Add Port.
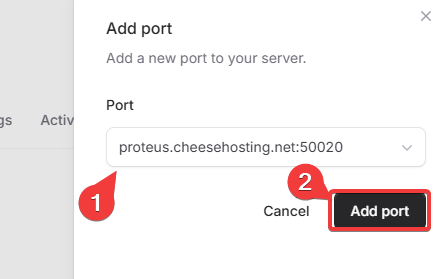
Copy the newly added additional port. Make sure you do not copy the primary port. In our example, this is 50020.
Almost done. The plugin is installed and a port has been opened for Dynmap. Now we need to assign this port to Dynmap.
Assigning the port to Dynmap
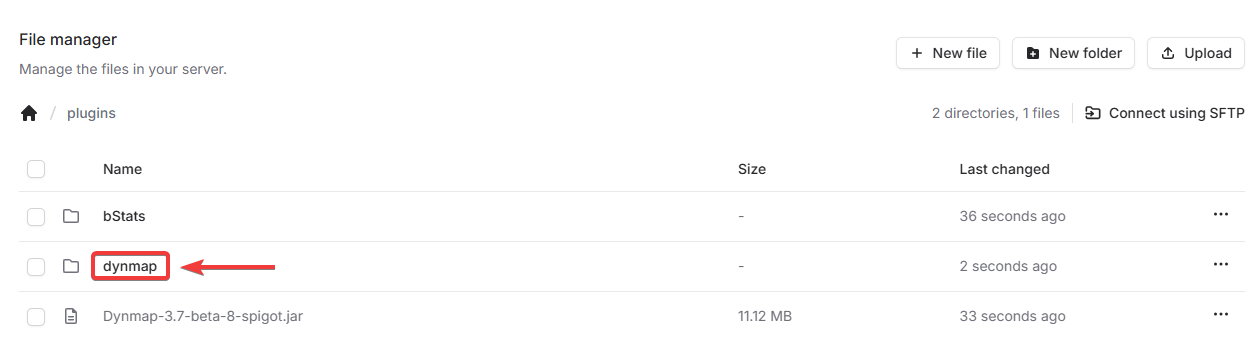
Click Files in the top navigation bar.
Open the plugins folder.
Open the dynmap folder.
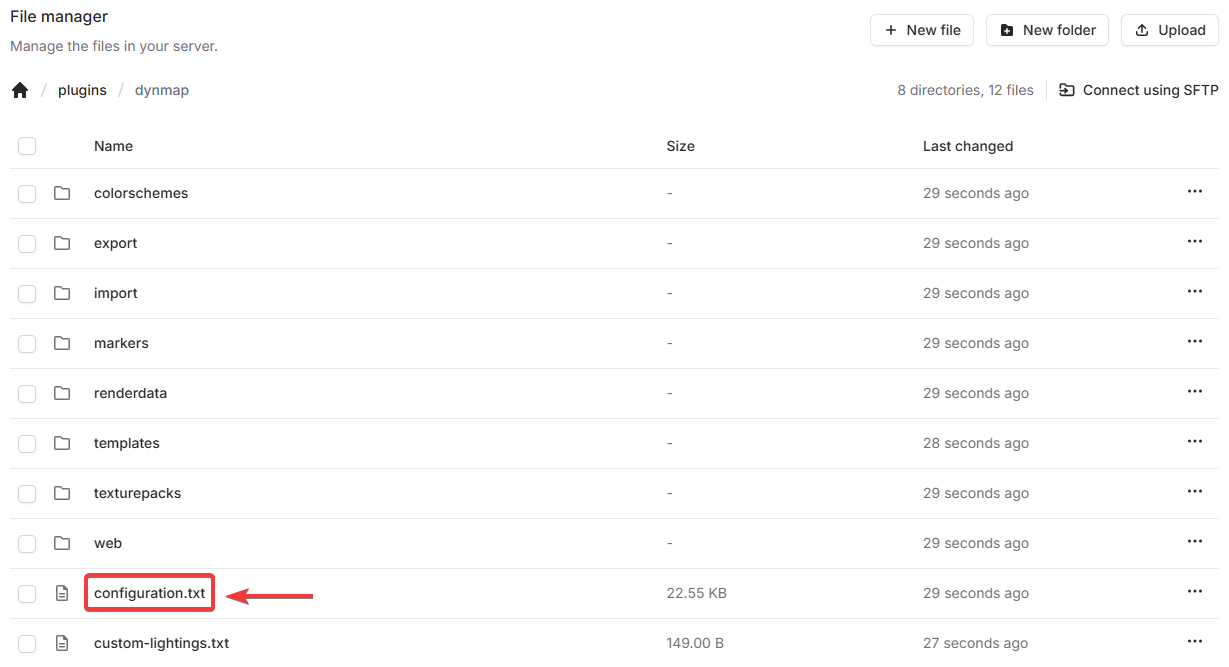
Open the file configuration.txt.
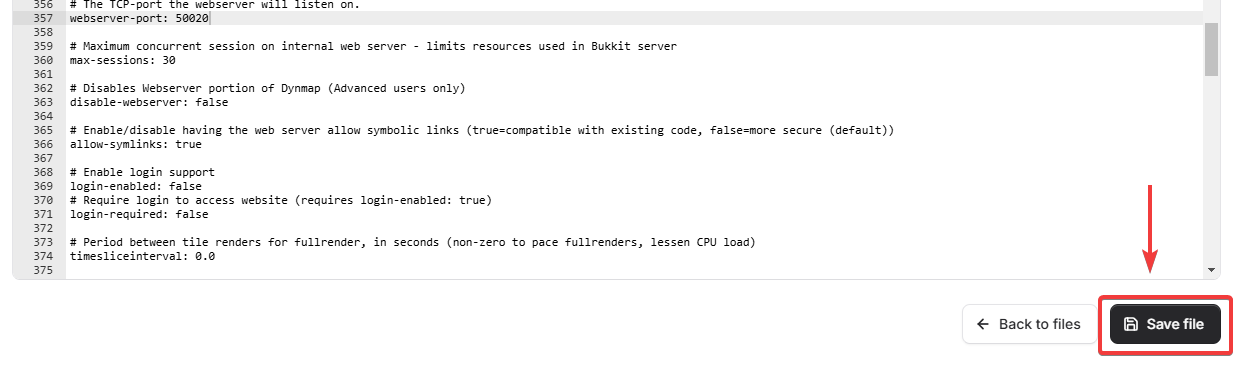
Scroll to the line that says webserver-port. In our case, this is line 357.
💡 Hint: met CTRL+F kun je in een document zoeken naar specifieke woorden. Probeer het eens!
Paste the copied port number next to webserver-port.
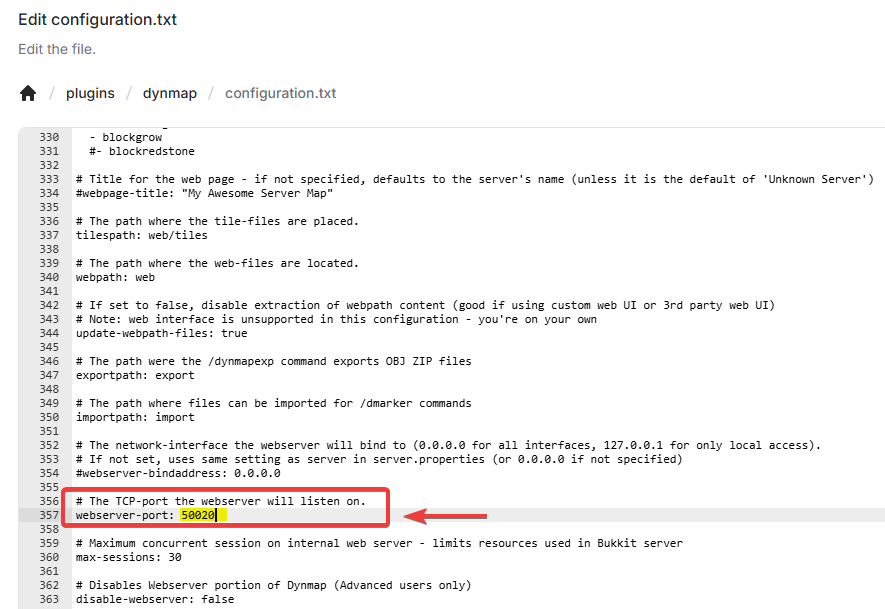
Click Save file in the bottom right corner.
That is it. Dynmap is now fully installed. Restart the server and Dynmap will start loading.
Accessing Dynmap
Once Dynmap is fully set up, you can access it using your Minecraft server IP followed by the configured port.
In our example, the IP is proteus.cheesehosting.net and the opened port is 50020. You can access Dynmap at: proteus.cheesehosting.net:50020